Welcome to WordPress.com. This is your first post. Edit or delete it and start blogging!
From October 12th to October 23rd I was lucky enough to participate in an amazing adventure offered to young Jewish people from the age of 18-26 known as Birth Right. There is much debate about the purpose of providing 18-26 year olds with a free 10 day trip across the globe to Israel. My tour guide jokingly referred to it as “birth rate”, referencing the fact that part of the purpose is to try to get young Jews to fall in love with and marry other young Jews.
Whatever your perspective, everyone has to agree that it is an amazing opportunity. It was one of the best experiences my 26 year long life has offered to me. And, of course, there was AMAZING food there – which is what I’d like to share J
One of the coolest thing was the variety of fresh fruit ready-for-the-picking along our many hikes:

Fresh Pomegranate from the tree – better than anything I’ve bought in the stores here. You can taste the sweetness by just looking at this picture! (Note: this particular pomegranate was bought but the ones we picked were just as juicy & tasty!)

Carob – a super food that helps with many things including improving digestion, lowering cholesterol and it’s an antioxidant. You can read more at http://healthmad.com/nutrition/12-great-benefits-of-carob

Orange with green skin – I’m not sure exactly what this was called – they’re the size of a tangerine actually. They’re SO good – I’d say better than any orange or tangerine I’ve had in the states.
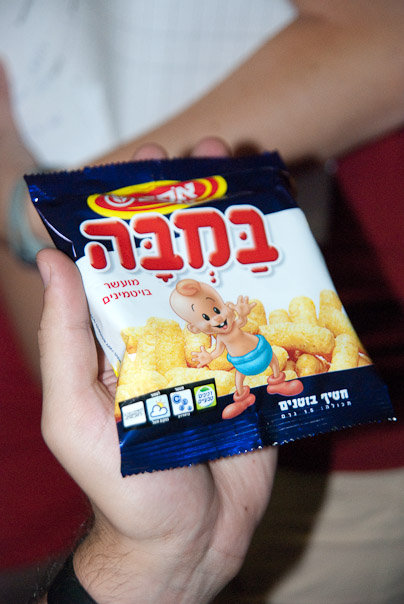
Bamba – one of the favorite snacks of Israeli youth. They have the consistency of cheese puffs but they’re peanut butter flavored!

Fresh made pita bread – one of the nights while in Israel we stayed in a Bedouin Tent. The food there was incredible. By far my favorite thing was the fresh made pita. The woman making it had a sphere shaped hot metal cooking device – she stretched the dough out in a manner similar to pizza dough, cooked one side on the sphere & then flipped it. AMAZING!
I also had a ridiculous amount of Falafel…see picture of me and some of my group members eating – I’m not sure I’ll be able to have this again for a while 🙂

And finally, I’d be remiss if I didn’t share with you a picture from the market in Jerusalem – a foodies dream place! Fresh, delicious looking & smelling fruits, veggies, spices, candies, pastries, breads, meats & fish! (And I’m sure I’m missing some food groups represented…)
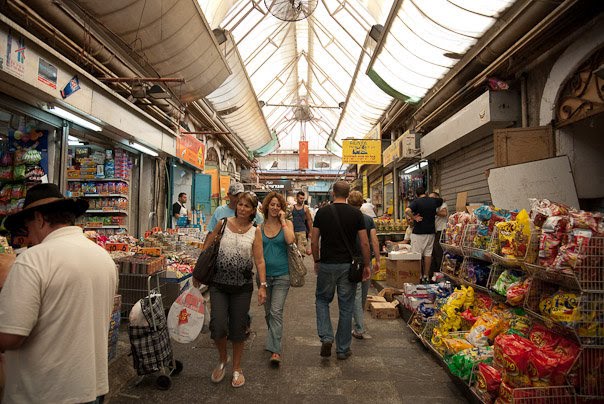
![]()
Posted in Travel | 2 Comments »
Clearly I have been MIA for a while…and for that, I apologize! A lot has been happening over the last few months that has, sadly, taken me away from blogging. Luckily, I have lots of great stories & foods to share with everyone!
If your curious – the two biggest things in the last few months are that:
1.) I’ve moved to NYC from Boston (a little sad, but what a wealth of food experience opportunities I’ve just gained!).
2.) I spent 10 wonderful days in Israel due to my eligibility for Birth Right – it’s great to be Jewish. Tons of stuff to share with you all from there, including fresh-from-the-tree fruit, delicious pita bread & more!
This weekend I’m having a house-warming brunch, so be prepared for some awesome recipes!
Also, holiday season is upon us…which means I’ll be sharing tons of awesome cookie recipes – check in if you love to bake for the holidays!
![]()
Posted in Uncategorized | 1 Comment »
Happy almost 4th of July to you all! If you live on the east coast…particularly in New England…join me in crossing your fingers that it will actually be sunny this weekend. To date, I’ve been wondering whether I really live in Boston…or if I somehow ended up in Seattle, WA – which, for the record, has had a ridiculous number of sunny days to date. Back here in Boston, I am not sure there was a single day in June without rain. Depressing…I know…
To brighten up the mood, I’d like to share with you all one of my favorite summer time picnic/pot luck recipes that everyone will enjoy. It is a lemon-pineapple Jell-o mold that is both creamy & jiggly…and entirely delicious.
You can use any type of mold that you like, though I strongly recommend avoiding anything with tight or sharp edges – because of the milk factor in this recipe, it’s not as solid as a normal gelatin mold. I use the following products, which I found on Amazon.com (click on the picture to find the listing):

The nice thing about this container is that both the top & bottom come off, allowing you to retain the shape of your treat. It also is a great carrying container – after setting, just keep it in the container until you’re ready to serve.
Here’s the recipe; enjoy!
Pineapple-Lemon Jell-O Mold
6 ounces lemon Jello
1 (20 ounce) can crushed pineapple in syrup
2 cups water
8 ounces cream cheese (room temperature)
1 (16 ounce) container of cool whip
1 (20 ounce) can crushed pineapple in syrup
2 cups water
8 ounces cream cheese (room temperature)
1 (16 ounce) container of cool whip
Drain pineapple and reserve juice, set pineapple aside.
Combine reserved juice and water, heat in microwave until very hot.
Stir jello into hot water/juice until dissolved. Do not heat further in microwave. Over-heating jello will denature gelatin and it will not set.
In separate bowl, stir cream cheese until smooth. Gradually add jello mixture into cream cheese.
Add pineapple
Chill until thickened, fold in cool whip.
Turn into a ring jello mold and chill for 6 hours or overnight.
Posted in Dessert, Recipe, Side Items | 3 Comments »
For those of you who have been reading my blog since September, you know that I’m a HUGE challah junkie. I probably like it more than anything – cake/ice cream…etc etc.
I’ve plugged this place before – but really, you have to check it out:
Located in Cleveland, Ohio, this place is out of this world. My favorite thing there is their Apple Challah…but they also have other ridiculously delicious confections, like their strudel. My family has been ordering from them for parties since I was a kid…we had tons of cherry & apple strudel for my Batmitzva party when I was 13…by my request of course :).
Don’t live in Cleveland, Ohio? No problem…they ship it all out! Believe me…it’s worth checking out. My mom sends my challah every once in a while – best surprise gift ever!
I was in Ohio for my dad’s 60th birthday this past weekend & stopped in to visit Lucy’s (and to get some Apple Challah, of course!). The man who owns the place, Michael Feigenbaum, is really personable & a great pastry chef. To order, you can either visit their site or email him at info@lucyssweetsurrender.com. They also have a blog, which you should check out:
Let me know what you think once you’ve checked it out. Oh, and if you need some visual stimulation to order from them, check out this giant challah, courtesy of Lucy’s Sweet Surrender:

Posted in Cleveland, Confectionery Gem, Jewish Recipes | Leave a Comment »

One of this blog’s readers reminded me that I never shared with you the awesome, healthified version of Pumpkin Pie that I found about a year ago. I believe I promised it to you guys around Thanksgiving – so sorry for the delay! It really is a great recipe though…and summer is a great time for pie. So, the timing is perfect!
I actually found this recipe on one of my favorite sites: Hungry Girl. If you haven’t checked it out yet, it’s a really great concept: she provides substitute recipes for foods that are normally very high in calories and fat. I’ve tried many of her recipes in the past – some have been remarkably similar to the “real thing”.
This substitute Pumpkin Pie recipes does a number on the nutrition facts of this classic pie recipe – so much so that you can actually have two servings & not feel guilty! Pretty awesome, right? Hungry Girl reports that a serving of her pie (1/8 of the final product) has only 133 calories, 3 grams of fat, 9 grams fiber, only 8 grams of sugar and 6 grams of protein. This is in comparison to a normal slice of pumpkin pie: 400 calories, 18 grams of fat, 2 grams of fiber, 28 grams of sugar and 7 grams of protein (recipes will vary).
The recipe does use sugar substitute, but honestly, I don’t think you can really taste it. Here is the recipe for you:
For Crust
2 cups Fiber One Brand Cereal
1/4 cup light whipped butter
1 tbsp. Splenda
1 tsp. cinnamon
For Filling
One 15-oz. can pure pumpkin (NOT pumpkin pie filling)
One 12-oz. can evaporated fat-free milk
1/2 cup fat-free liquid egg substitute (I really like baking with these!)
3/4 cup Splenda
1/4 cup sugar-free pancake syrup
1 tbsp. pumpkin pie spice (I combined nutmeg, cinnamon & ground cloves for this)
1/2 tsp. cinnamon
1/8 tsp. salt
Optional Topping: Fat Free Reddi-wip or Cool Whip Free
Preheat oven to 350 degrees.
In a small microwave-safe bowl, combine butter with 2 tbsp. water. Microwave until just melted, and set aside.
In a blender or food processor, grind Fiber One to a breadcrumb-like consistency. You can also get the right consistency by smashing up the Fiber One in a bag using a hammer. It’s not nearly as easy as using a food processor, though.
In a medium mixing bowl, combine butter mixture and crumbs with remaining ingredients for crust. Stir until mixed well.
Spray an oven-safe 9-inch pie dish lightly with nonstick spray. Evenly distribute crust mixture, using your hands or a flat utensil to firmly press and form the crust. Press it into the edges and up along the sides of the dish. Set aside.
In a large mixing bowl, combine all ingredients for the filling. Mix well.
Pour mixture into pie crust. The filling may be taller than the crust – according to HG, this is okay. If you have any left over, place in small, greased ramekins & bake for about 22- 28 minutes (ovens will vary – important to pay attention to these as they can dry out easily).
Bake pie in the oven for 45 minutes. Allow pie to cool slightly after removing from the oven.
Refrigerate for several hours (overnight is best). Keep refrigerated until ready to serve.
Posted in Dessert, Healthy Ingredients, Healthy Recipe, Holiday, Pie, Recipe | 2 Comments »

This past weekend I was down at my beach house in New London, CT with some girlfriends from college. Conveniently, my beach house resides in the same town as our Alma Matter (Connecticut College). The point of the weekend? To catch up & to go to all of our most memorable places from our 4 years together. You know what we realized? About 95% of what we wanted to do while reminiscing had to do with eating…yikes…I’m not sure how I stayed thin in college…

One of my favorite traditions with these ladies was to go to Friendly’s for dinner & ice cream…especially the ice cream. If you haven’t been, it really is quite the treat. One of my friends never fails to get the Reese’s Pieces sundae (which, I might add, is quite tasty). If you went to Friendly’s as a kid, though, you might remember something called the Cone Head Sundae…you know…ice cream in a bowl, chocolate dipped sugar cone for the hat, whipped cream for the ears, Reese’s Pieces under the ice cream & used for the eyes/nose…so fun!
Somehow, my friend Katrina was able to talk the waiter into creating this Sundae for her (so if you go & it’s not on the menu…don’t take no for an answer!). I must say, he did a great job & it was really cute. Take a look:
 It’s funny how so many traditions revolve around eating…I’m sure you all have your eating traditions with friends, family, coworkers…etc. My advice? Everything in moderation…life is too short to deny yourself, but you don’t want to gorge on high calorie snacks all day either J
Happy eating & happy summer! Hopefully it’s warmer where you are than here in Boston – it has been the coldest June!
Posted in Uncategorized | Leave a Comment »
 The PR department at my company often receives free magazines where our stores have had products featured. One of my absolute favorite publications, Cook’s Illustrated, is amongst those publications. This is absolutely awesome because I can peruse the recipes, tips and tricks for free!
A few days ago I was looking through one such magazine and happened upon three great tricks for making deliciously perfect chewy chocolate cookies. I’m certainly going to be trying these out; I thought some of you might appreciate them as well.
Eliminate the Yolk: Reduce your egg(s) to just the white portion. This cuts excess fat, which can make cookies too tender.
Incorporate Cocoa: Use powder cocoa rather than melted chocolate in your batter. This will help to keep tenderness in check. (Use a high quality cocoa so that you don’t lose the intense chocolate flavor). You can also substitute more cocoa for some of the flour to enrich the chocolate flavor without hurting the consistency. Be careful to not subsitute too much – the reaction between the flour & liquid ingredients greats gluten, which helps the cookies stick together.
Use Less White Sugar: By replacing some of your white sugar with dark corn syrup and dark brown sugar, you’ll help to boost your cookie’s chewiness.
Cook’s Illustrated is now available through an online subscription! So, you don’t have to sort through paper magazines anymore…just sign in online!
![]()
Posted in Chocolate, Cookies, Dessert, Quick Tip | 2 Comments »
It is my eventual goal to open up a business whose main objective is to sell deliciously irresistible baked goods. These days, with The Food Network becoming more an more popular, the food market is becoming increasingly competitive. Because of this fact, it is important to have a unique & thrilling concept that draws a crowd.
Now think…try to remember a time when you ran into a coffee shop or bakery in your home city or in a city you were visiting and thought “wow, what a great idea”. Or maybe I’m describing your favorite place to go for regular brunch dates with your friends…or the local coffee shop you curl up and read in every Sunday afternoon. You know what I’m talking about – that great idea that you wish you had come up with…
I just got back from yet another weekend in NYC (do I live in Boston or NYC? I’m starting to wonder…). While there, I went not once but twice to one of my favorite bakery businesses in the city. The first time was to pick up one of their famous Pumpkin Scones (A-MA-ZING), and the second time was to have brunch with my friend Kristen.

The place is called Alice’s Tea Cup and is the greatest concept for all ages. From small children to great grandparents, and all that fall in between, this place is perfect. When kids arrive, they’re dusted with “fairy dust” and outfitted with “fairy wings” that they wear throughout their dining experience. The place is great for any dining experience: a couples brunch, a casual meal, or little kid’s birthday parties. And did I mention the scones?? Out of this world…I need to find the recipe for their pumpkin scones (help!)…like I just said, they’re incredible. Crispy on the outside, fluffy and hearty on the inside…just enough sugar to satisfy and sweet tooth, but not overwhelming.

The wait staff there is young and energetic, and the atmosphere is adorable. The decorations literally make you feel as though you’ve fallen into the Alice in Wonderland book. The walls are covered with pictures of Alice in Wonderland statues (from around the city) and quotes from the story. Many of the tables are old sewing tables, which ads even more flavor to the place.
Aside from the scones, which I think you get by now that I LOVE, their tea is brewed upon ordering and is incredibly tasty (huge variety available too). The rest of the food is well made and worth checking out too.
NYC has three locations; one on the Upper West Side and two on the Upper East Side. Be sure to get there early (around 9/930) on a weekend if you don’t want to wait…once you get into “normal” weekend waking hours, you can expect to wait for over an hour. Surprised? I told you…it’s really good :). They also have a display counter where you can get baked goods to go (the scones I keep raving about as well as cupcakes, cookies & other great confections).
Check them out – you won’t be disappointed.
![]()
Posted in Confectionery Gem, NYC | 1 Comment »
There are many reasons that I love being Jewish, but one of the big ones is the food. Cultures around the world focus around traditions including cuisine. Being a self admitted carb-a-holic, being Jewish works out quite well for me…not so much for my diet; thank goodness for self control.
One of my personal favorite “dishes” of Jewish cuisine is the traditional bread called Challah. A white, fluffy, sweet bread, this stuff is to die for. When I was little, my family coined the phrase “Challah hollower”…apparently I only enjoyed the soft inside and therefore chose to pull that out of the loaf to the horror of the rest of my family. By the way, I do enjoy the crust now :).
Now living in Brookline, MA, there are a lot of great places to buy delicious challah: Clear Flour Bread Bakery, The Butchery, and there is a woman who makes amazing challah & sells it at the JP Licks on Harvard Ave (in Coolidge Corner). Back in Ohio, where I’m from, there is this bakery called Lucy’s that makes the most insanely delicious Challah I’ve ever had in my life. They have a variety of flavors, my favorite being the apple cinnamon. I’ve heard from my mother that they’re closing…I’ll be home in a few weeks and plan to go beg for some of their recipes…we’ll see how that goes…
Personally, though, I love to make it! Time consuming? Maybe a little…but the dough tastes aweseome and, quite honestly, there is nothing like filling the apartment/house with the smell of freshly baked bread. And the taste…incomparable!
Last weekend I visited my friend in NYC – the main purpose of the visit was to attend the Belmont Stakes (awesome!). As a thank you to her for constantly hosting me, I brought her my “famous” cinnamon sugar challah (I say “famous” because she is obsessed).
Here is the recipe that my mother shared with me – I’m not sure where she got it, but it’s awesome.
Challah Bread
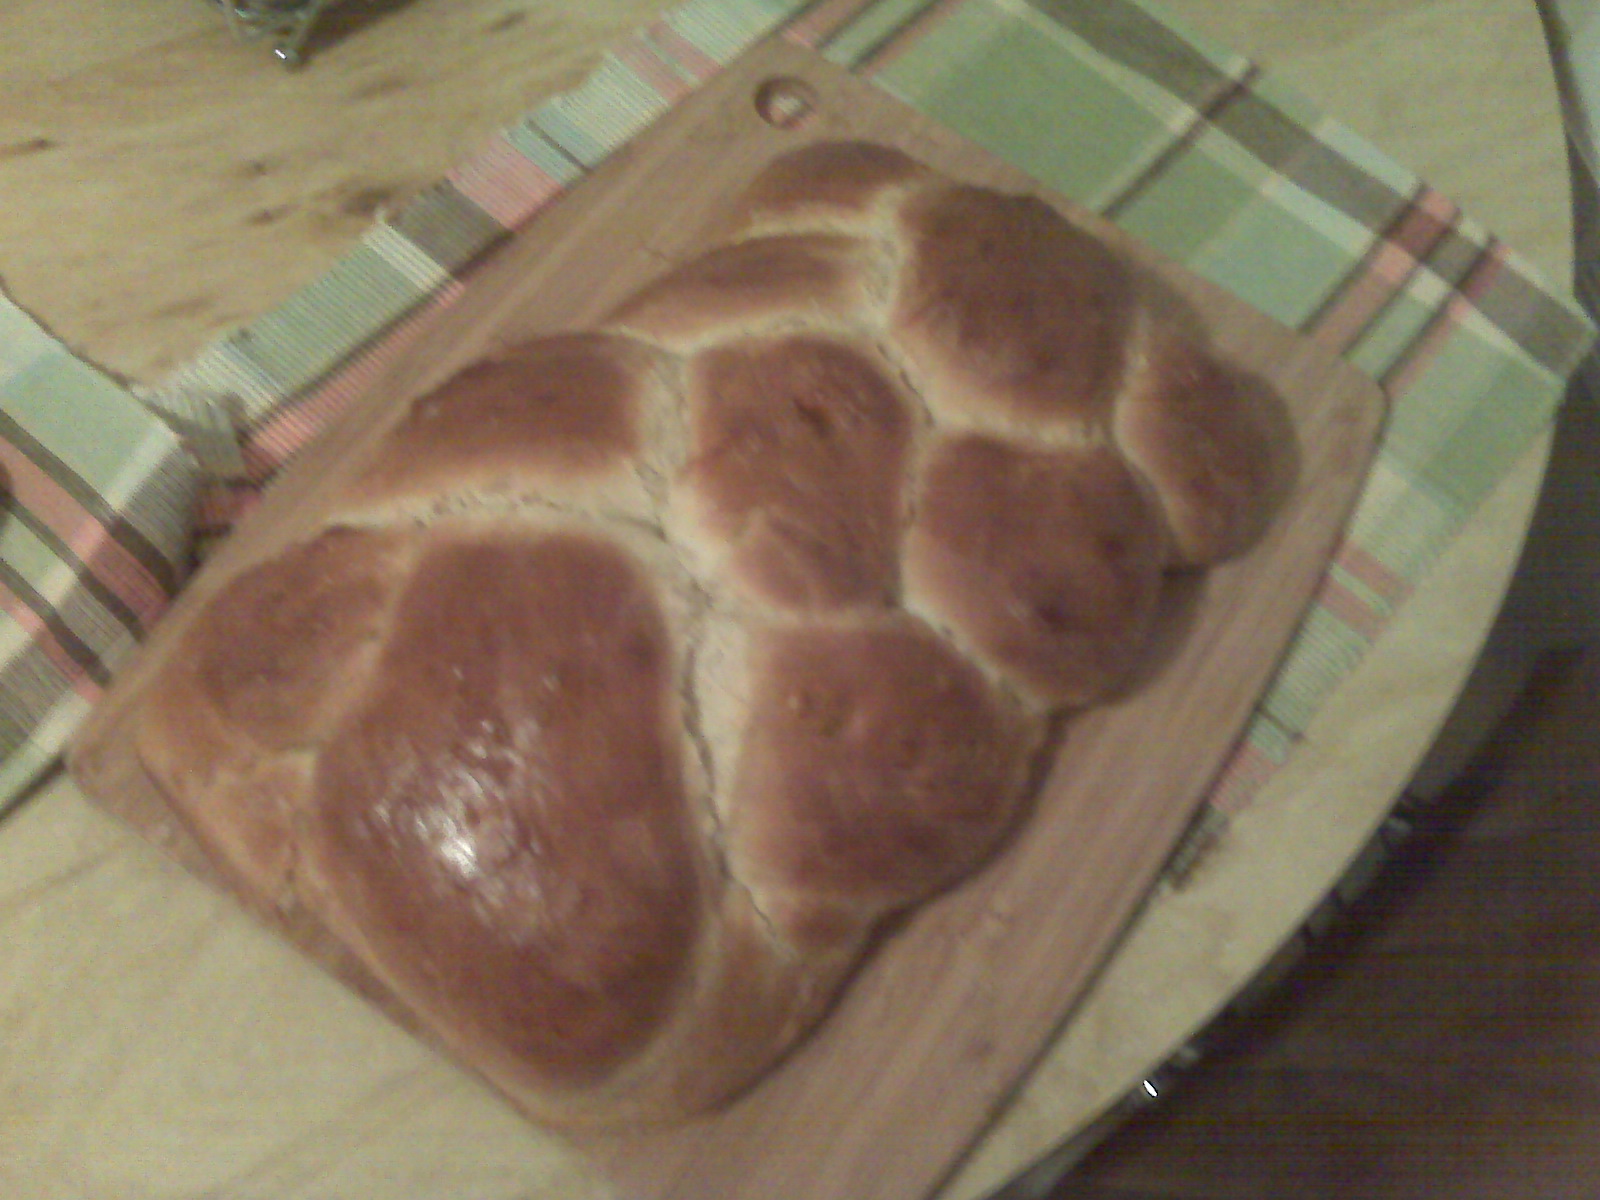 (Thanks to my sis for the pic – she made it recently as well!)
4 to 4 1/2 cups unbleached flour or bread flour
1 package of dry yeast or 1 cube of cake yeast
1 1/4 cups lukewarm water
1/4 baking powder
1/4 t cinnamon
1/2 t salt
1/2 t vanilla
2 large eggs
3/8 cup oil (corn or vegetable)
3/8 cup + 1/8 TBSP sugar
1/4 t cinnamon
1/2 t salt
1/2 t vanilla
2 large eggs
3/8 cup oil (corn or vegetable)
3/8 cup + 1/8 TBSP sugar
Place 6 cups of flour in a large mixing bowl and make a well in the center.
Blend the yeast with 1 cup of water. Stir to dissolve.
Pour yeast mixture into the well in the flour.
Using a fork begin stirring the yeast mixture in the well, gradually blending about ¼ of the flour into the yeast mixture.
Cover the bowel with a damp towel and set in a warm place to stand for 45 to 50 minutes.
Sprinkle baking powder, 3/8 cups sugar, cinnamon, and salt over the flour and yeast mixture.
Add the vanilla, 3 eggs, oil, ¾ cup of oil and the remaining water. Blend with the fork.
Add two cups of flour and work into the dough with hands. If dough is sticky add up to another cup of flour.
Continue to work the dough with hands for another 10 minutes. When dough does not stick to hands, it is ready (add more flour if necessary).
Shape the dough into a coarse ball. Cover with damp towel and let rest for 20 minutes.
Turn dough out onto a floured board or granite surface and knead, adding flour as needed to keep from sticking, about 5 minutes.
Shape dough into a smooth ball. Place in floured bowel. Cover with damp towel and allow to rise in a warm place for 30 minutes.
Turn the dough out onto the floured surface. Cut dough into four equal pieces and shape each into a rope. Avoid handling dough too much.
Line the four ropes vertically next to each other. Pinch together at one end. Braid by bringing the far right rope over, under and over the next three ropes. Repeat until ropes are braided together and pinch ends together.
Tuck ends of braid under the loaf.
Place loaf on a generously greased 15 x 10 baking pan. Cover with damp towel and allow to rise for one hour. Volume should approximately double.
Preheat oven to 325°
Beat the remaining egg with ⅛ t sugar and brush over the loaf.
Bake for approximately one hour.
![]()
Posted in Holiday, Jewish Recipes, Recipe | 5 Comments »
